EECS 489: Virtual Machine Setup Guide
The University of Michigan, Fall 2025
Welcome to EECS 489! This guide will help you set up a virtual machine (VM) environment using VMWare or VirtualBox on both Windows and macOS.
Importing the VM Image
A VM disk image is a single file on a host computer that functions as a hard disk for a virtual machine, containing the containing the guest operating system, applications, and user data, similar to a physical hard drive. In order to install the correct VM disk image, it is important to first determine the CPU of your machine.
Identify your CPU
This section describes how to identify your CPU architecture on a Mac. Windows machines are overwhelmingly on Intel/AMD chips on an x86 architecture. If you're not sure what architecture your non-Mac laptop uses, search up the model specs. If it is an ARM-based CPU, follow the instructions for "Apple Chip." If it's an x86 chip, follow the instructions for "Intel Chip."
-
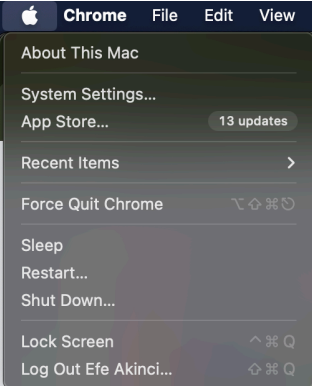
Click the Apple Logo on the top left of your screen, and click "About This Mac."
-
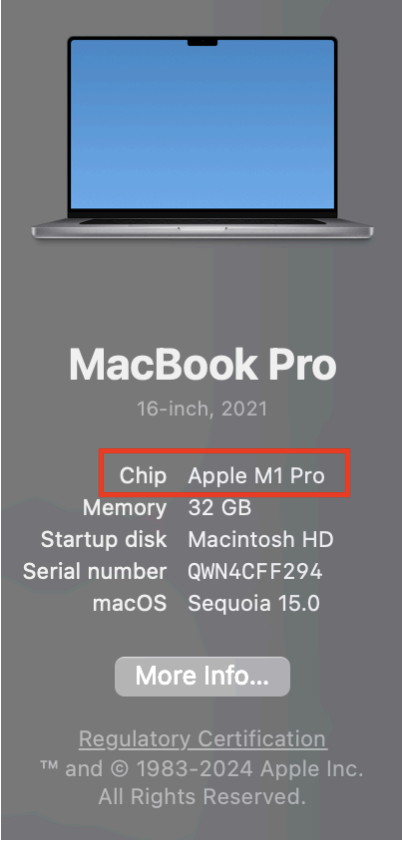
Make a note of what the item labelled "Chip" says.
-
If the chip is of the form Intel *, follow the instructions for Intel Chips below. If it is of the form Apple M*, follow the instructions for Apple Chips.
Download the Ubuntu Image
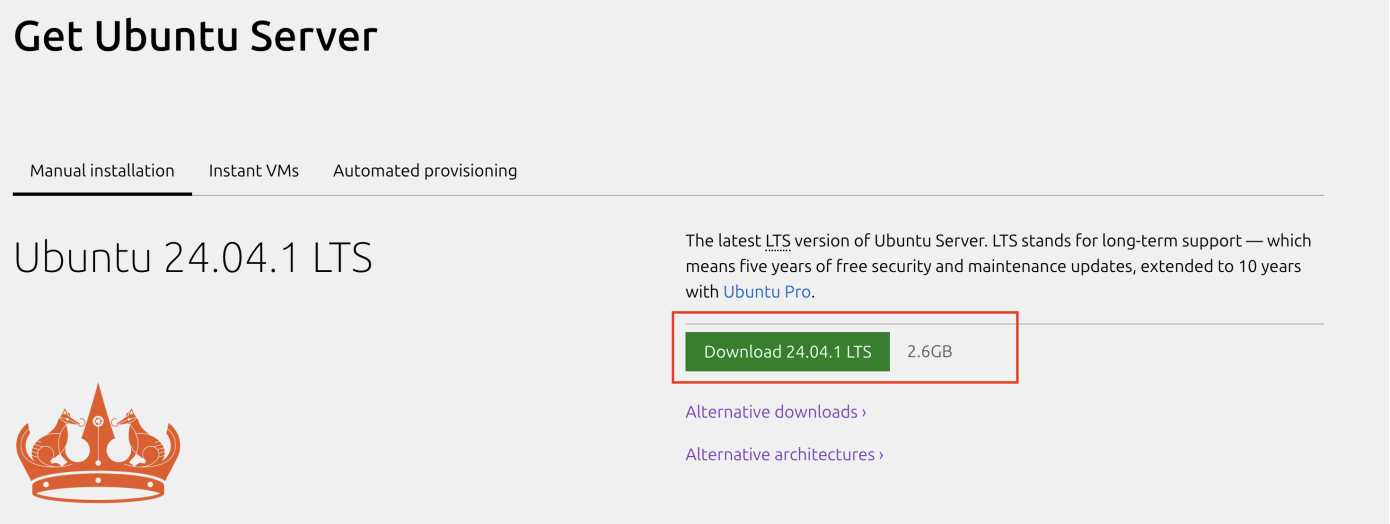
Intel Chip
-
Click the big button that says "Download 24… LTS."
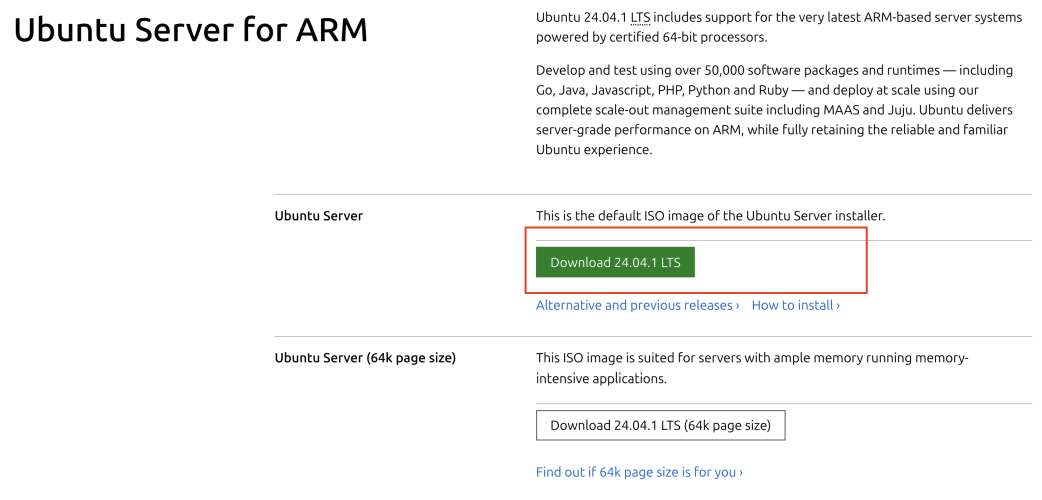
Apple Chip
- Go to https://ubuntu.com/download/server/arm.
-
Click the big button that says "Download 24… LTS"
Install your Hypervisor
A hypervisor is a program used to run and manage one or more virtual machines on a computer. It acts as an abstraction layer between a host's physical hardware and the virtual machines it supports. This section provides instructions on installing VMWare or VirtualBox on Windows and macOS. You only need to install one or the other, whichever you prefer!
Installing VMWare
-
Go to VMWare Fusion Player Downloads and click the "Download Now" button. This will take you to the Broadcom sign-in page.
-
At this point, you will need to register for a free Broadcom account.
-
After setting up your account, return to the Broadcom sign-in page and login to your account.
-
Now that you are signed in to your account, follow the instructions below to download the correct version of VMWare for your OS.
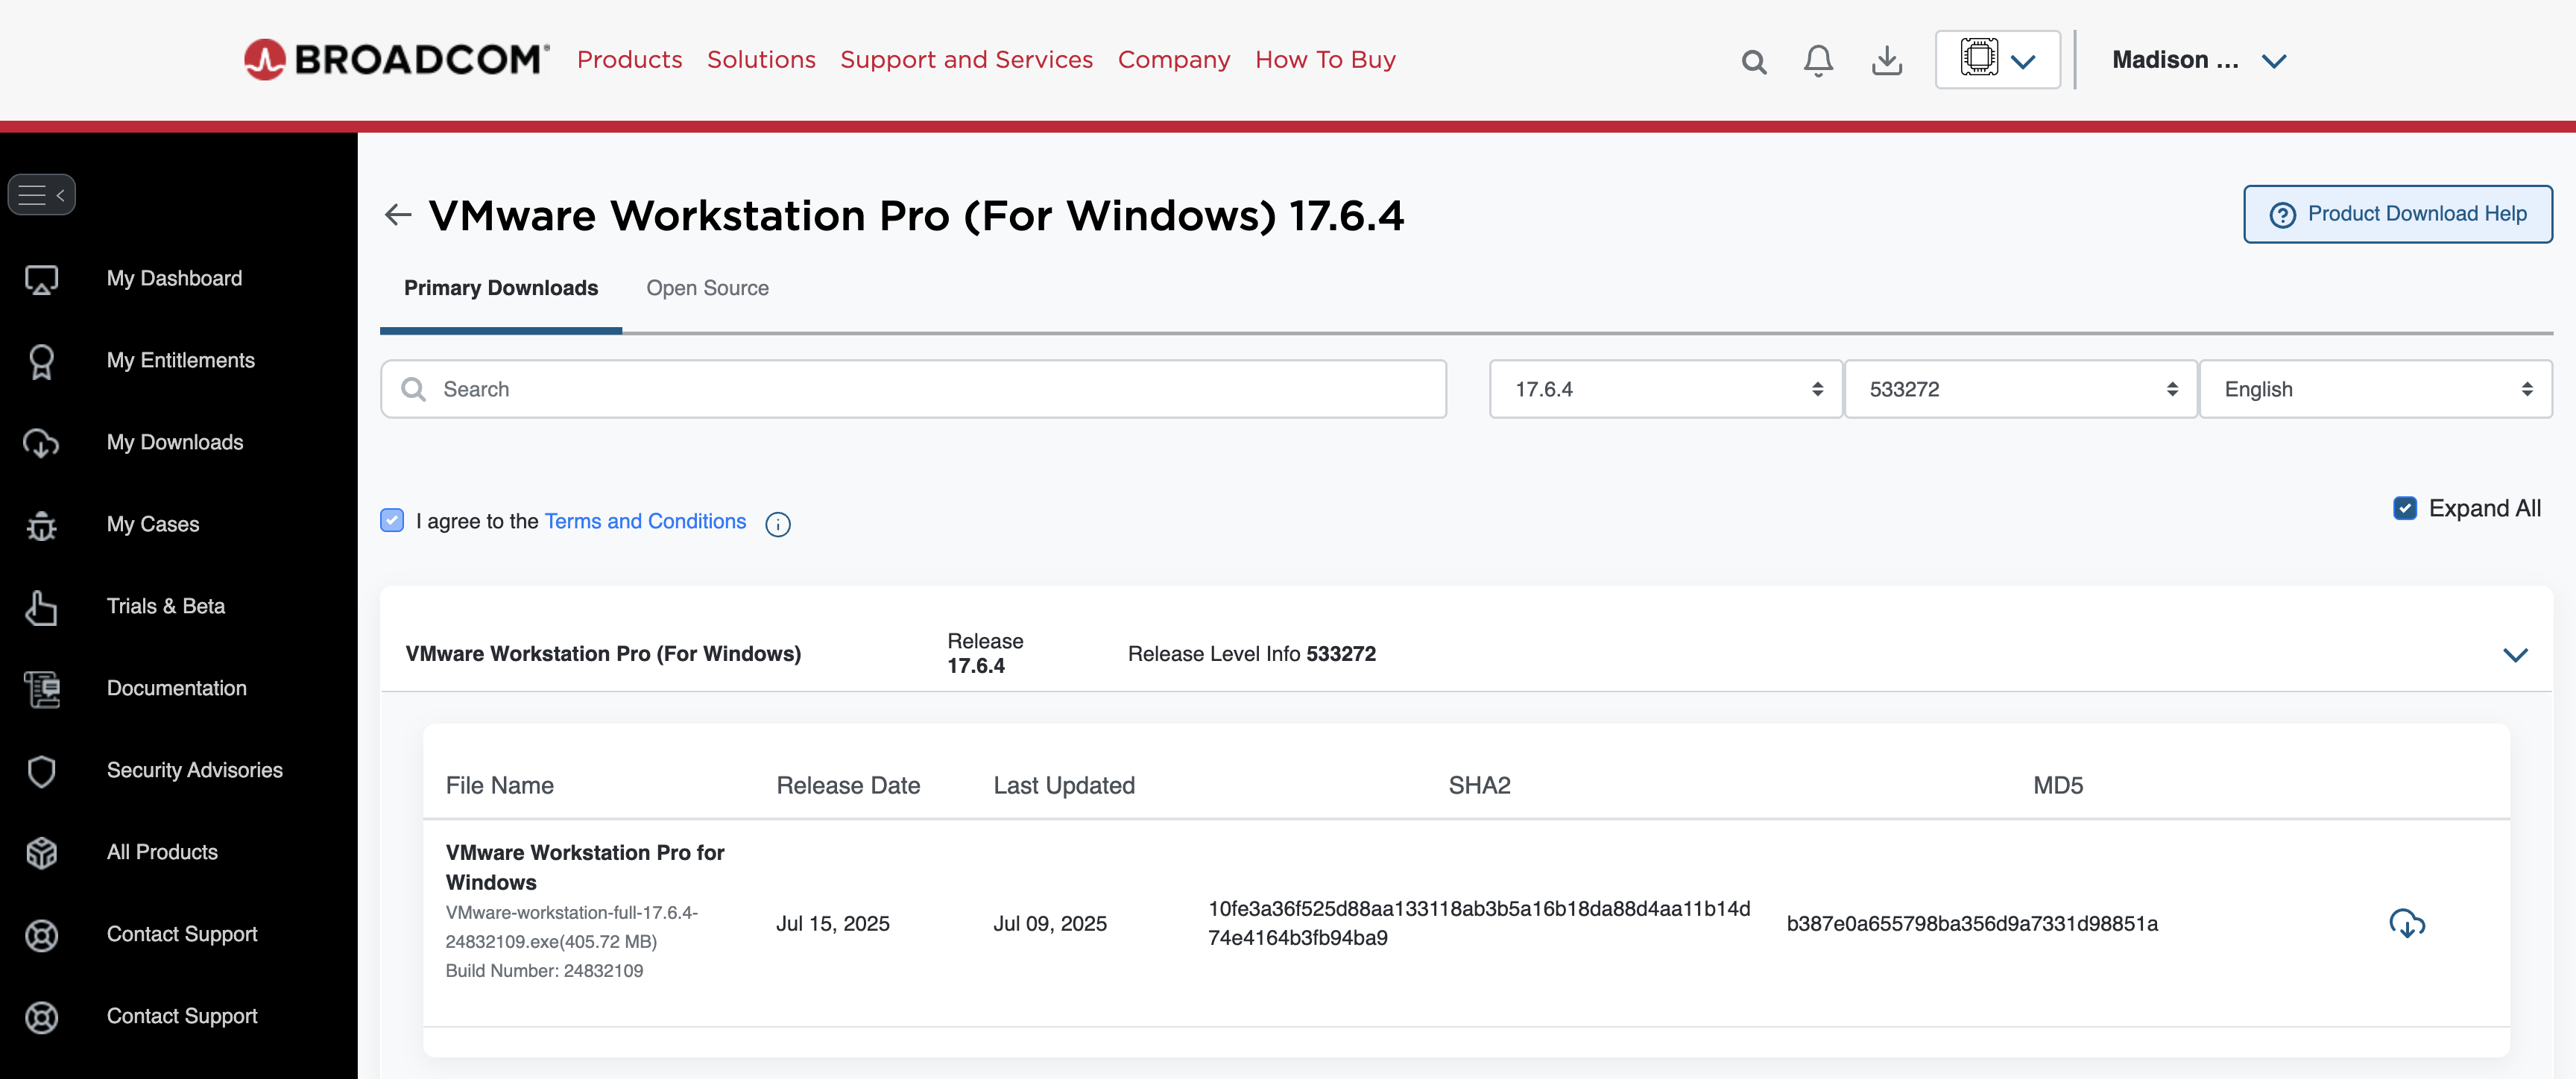
VMWare Workstation Pro (Windows)
-
Select the Windows version with the latest release version. You will need to click on the "Terms and Conditions", select "I agree to the Terms and Conditions", then click the download button.
Run the installer and follow the steps.
-
Launch VMWare Workstation Pro after installation.
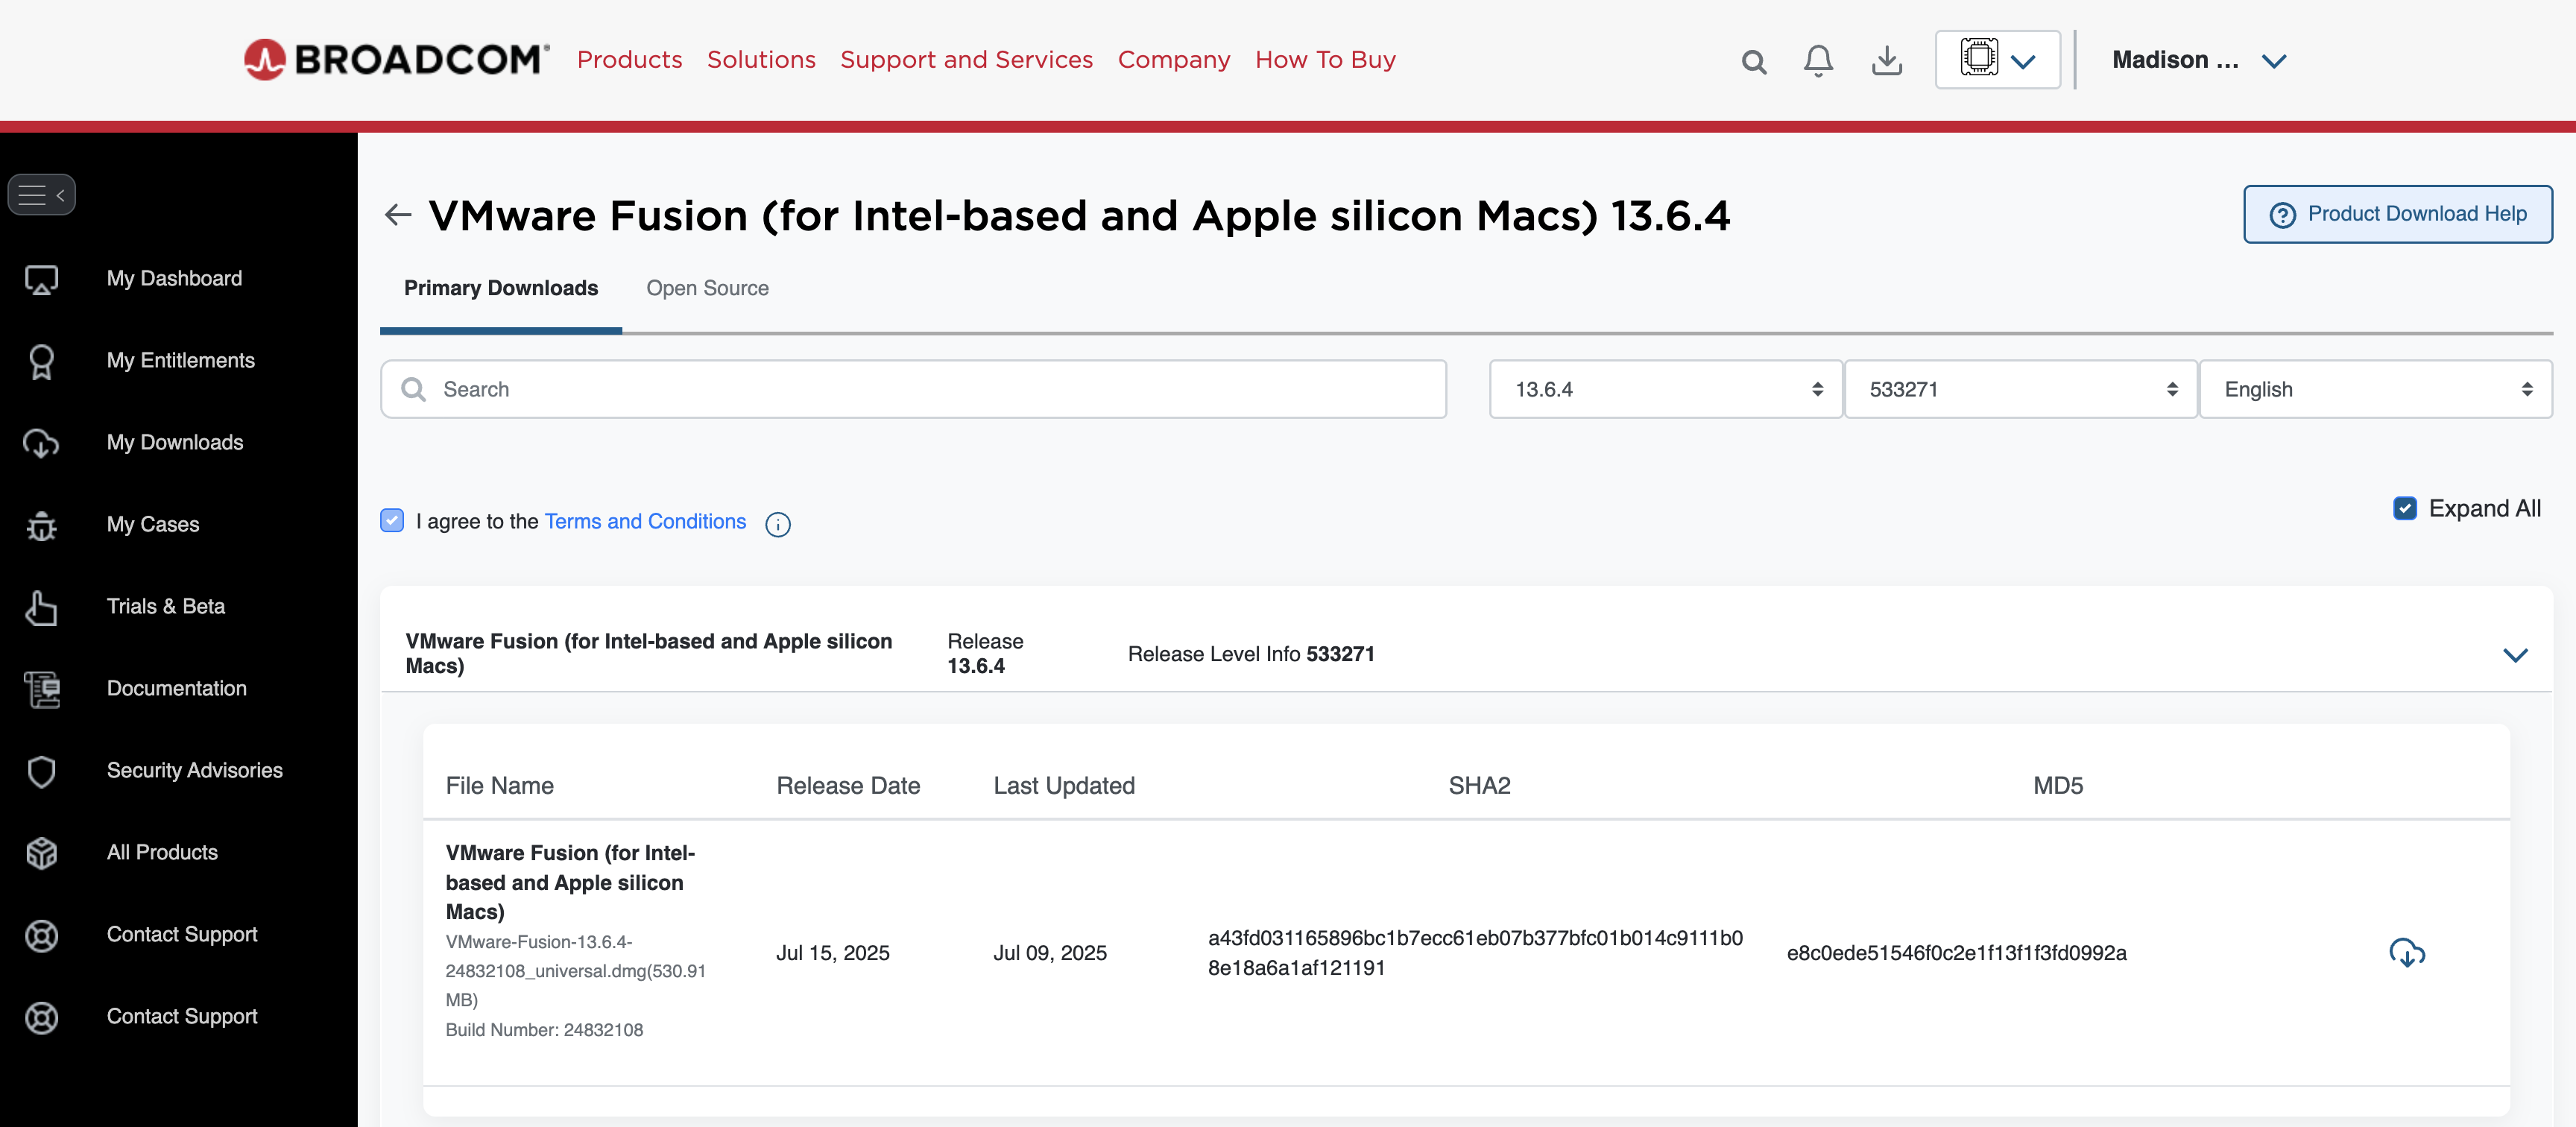
VMWare Fusion (macOS)
-
Go to VMWare Fusion Downloads.
-
Select the Mac version with the latest release version. You will need to click on the "Terms and Conditions", select "I agree to the Terms and Conditions", then click the download button.
-
Open the
.dmgand drag VMWare Fusion to your Applications.
Installing VirtualBox
Windows
-
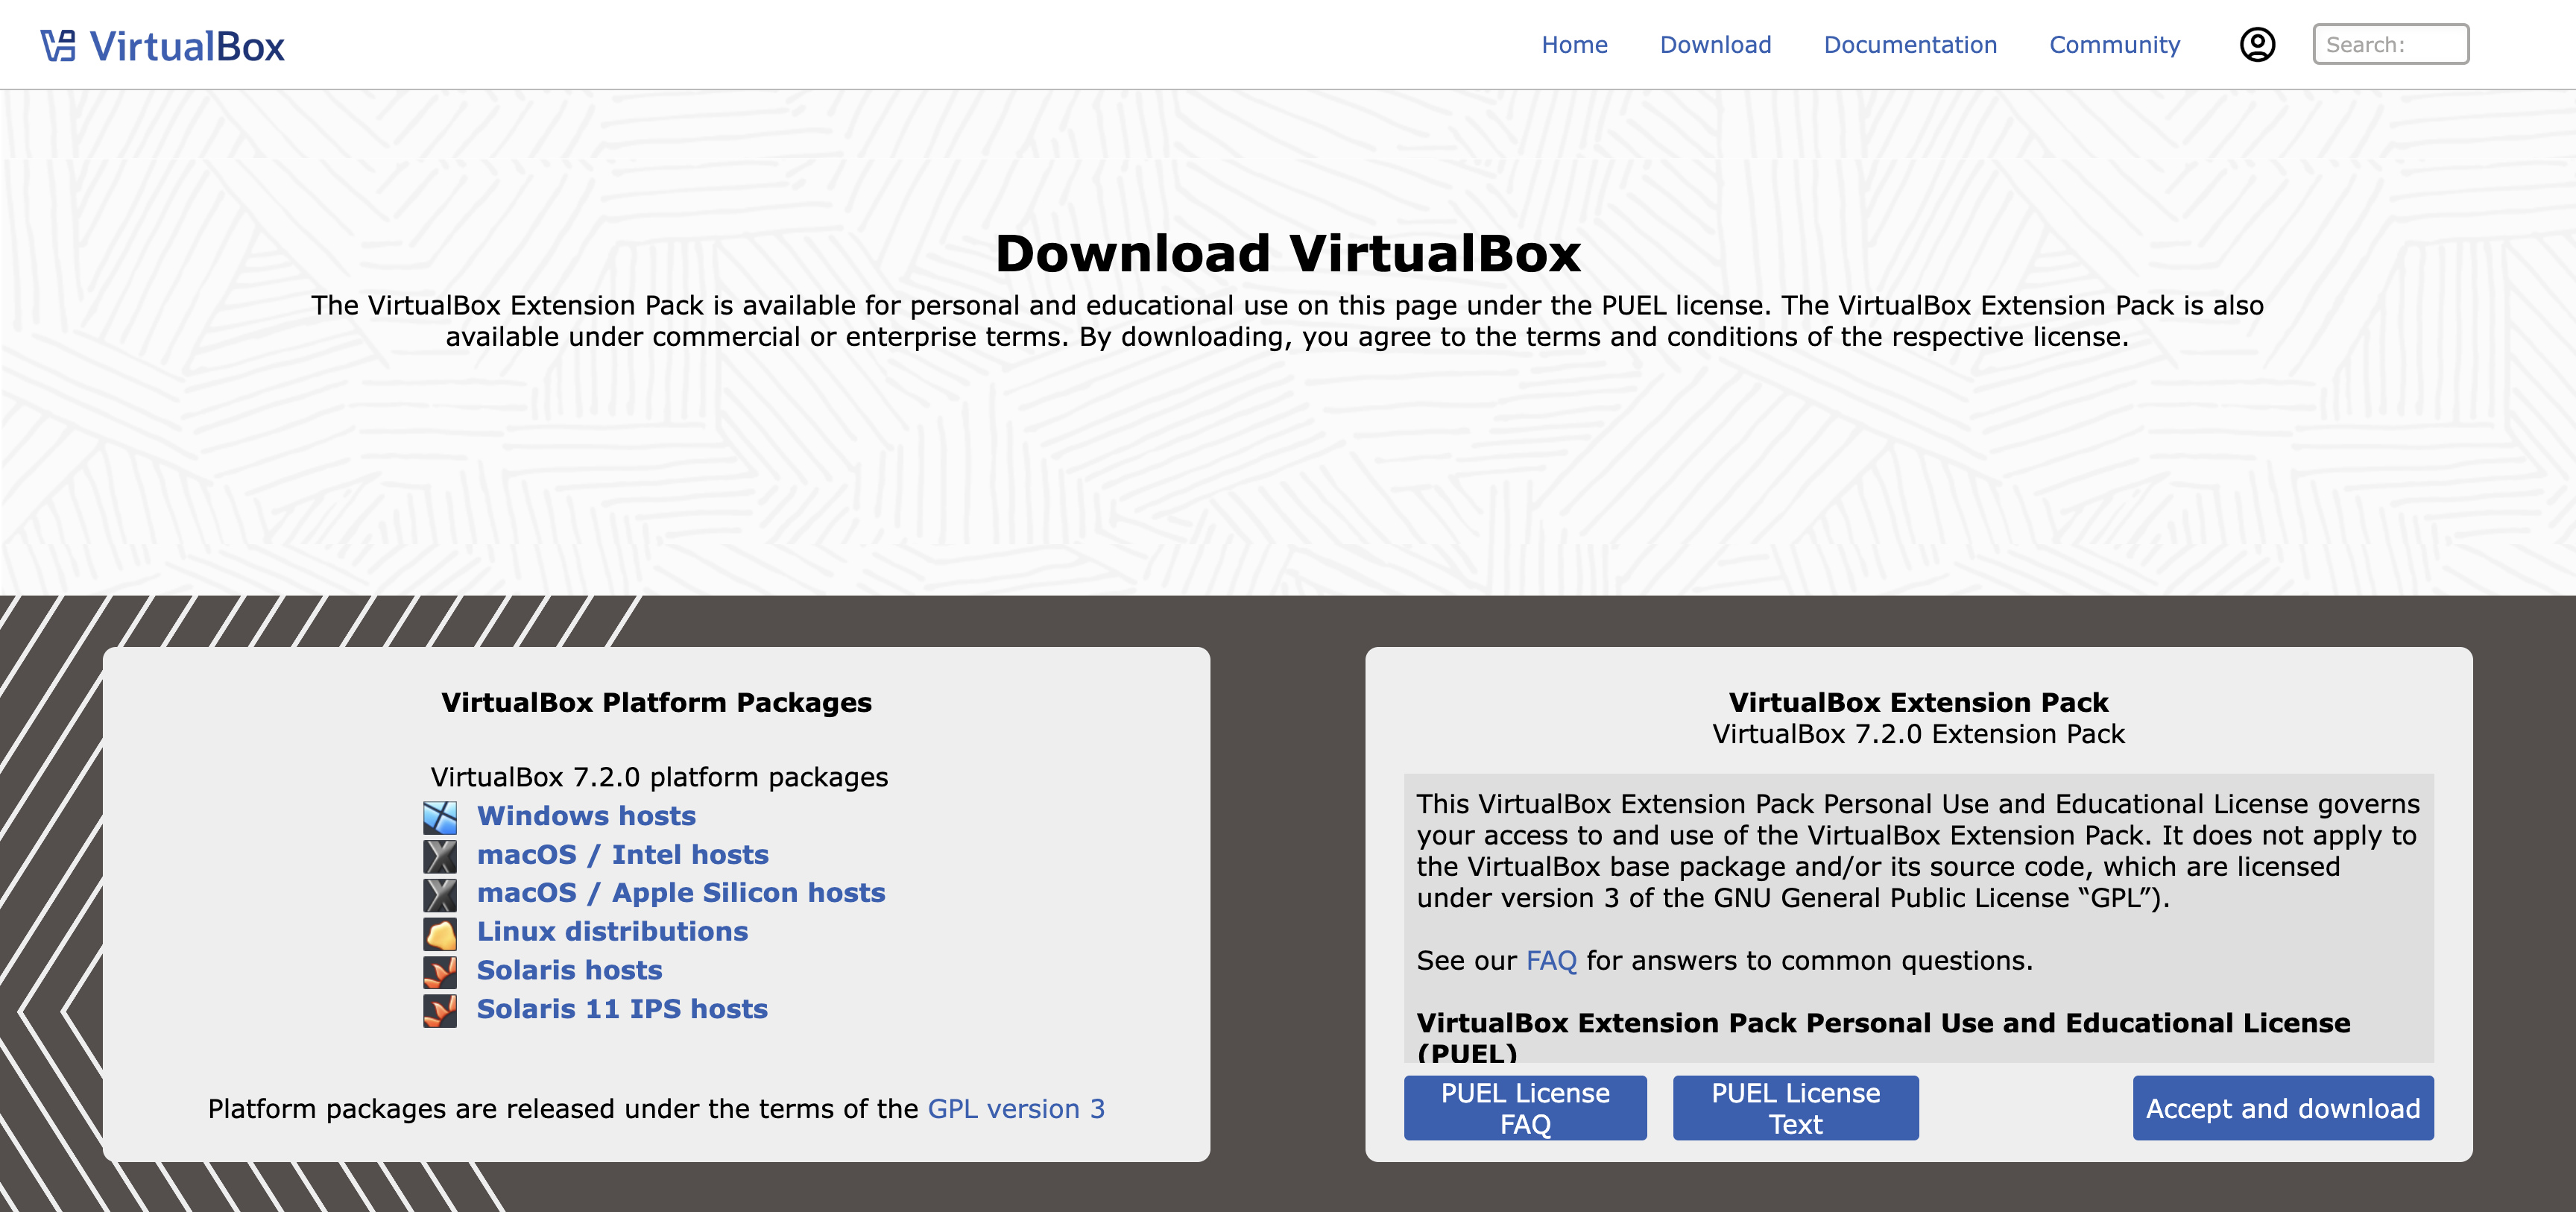
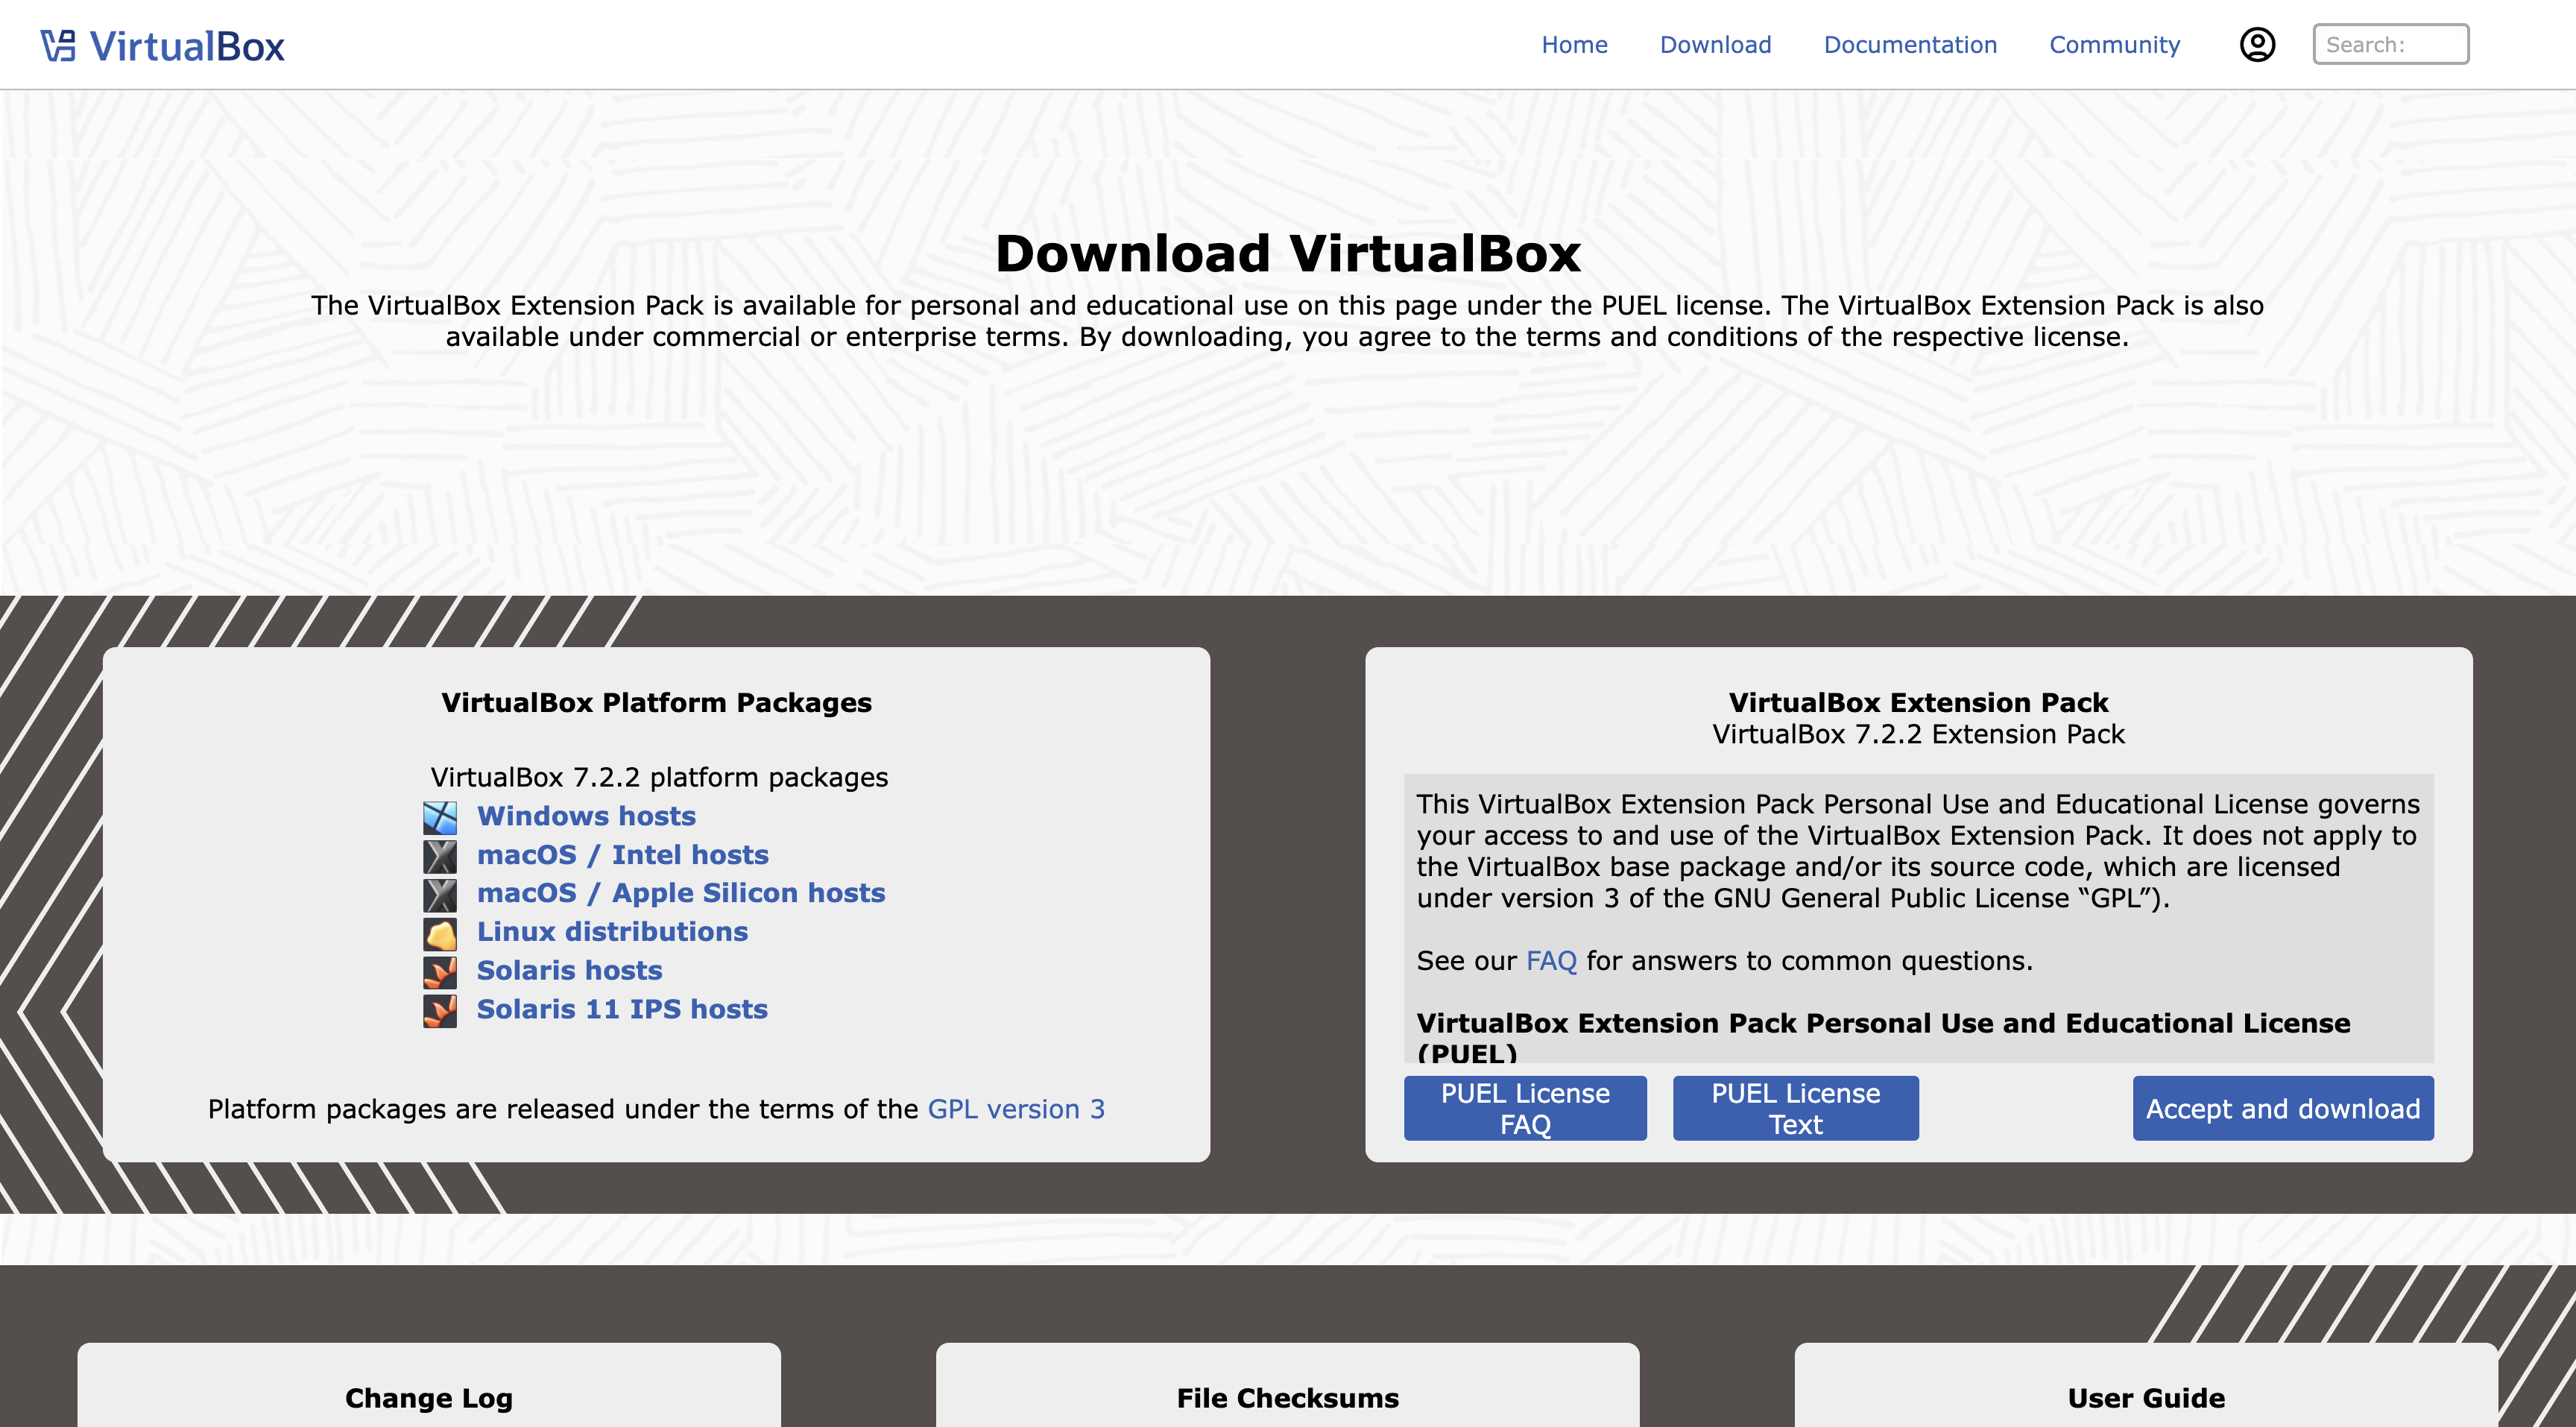
Visit the VirtualBox downloads page.
-
Download Windows hosts installer.
-
Run the installer (
VirtualBox-x.x.x-xxxx-Win.exe), and follow the on-screen instructions. -
(Optional but recommended) Install the VirtualBox Extension Pack from the same page.
Once installed, launch VirtualBox.
macOS
-
Visit the VirtualBox downloads page.
-
Download OS X hosts installer.
-
Open the
.dmgfile and double-click the VirtualBox.pkg installer.
-
Follow the install prompts. If you get a security block, open System Preferences > Security & Privacy, and allow Oracle.
(Optional) Install the Extension Pack.
Configure your VM
Now that your hypervisor is installed, we need to configure the virtual machine. The instructions for VirtualBox setup on Windows and macOS are similar, so we combined these sections. Feel free to skip to whichever hypervisor you installed in the last section (VMWare or VirtualBox).
VMWare
VMWare Fusion (macOS)
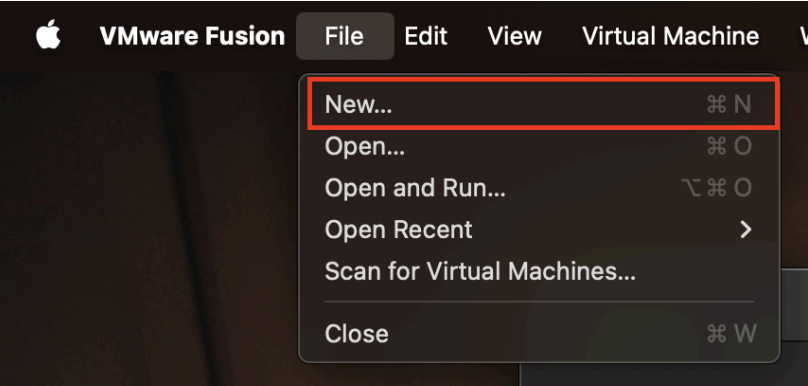
Launch VMWare Fusion. Once it is launched, on the toolbar, select "File," followed by "New."
Make sure that "Install from disc or image" is selected, and click "Continue."
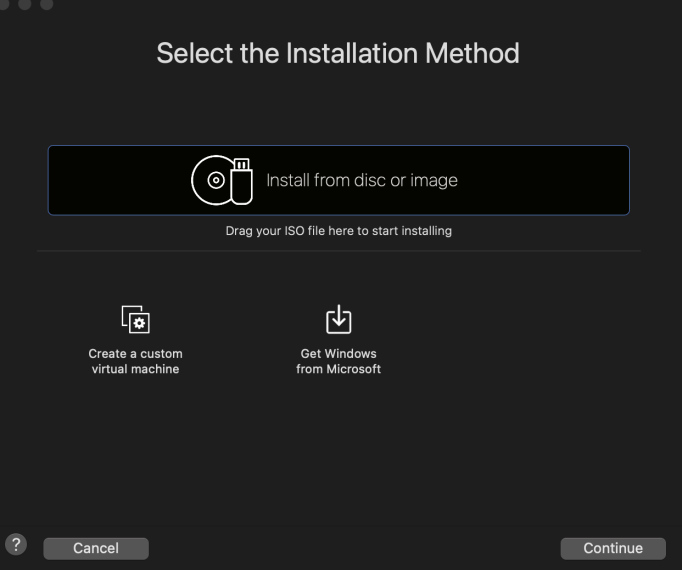
Note: If you have issues with drag-and-drop for the disk image, double click the "Install from disk or image" to manually select the image from your file system.
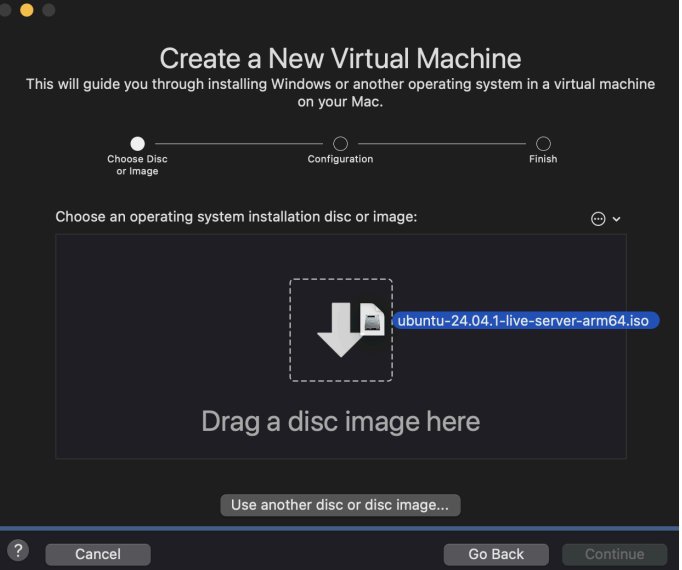
Drag the .iso file you downloaded from the Ubuntu website onto VMWare Fusion and click continue.
On the next screen, make sure that 4GB of RAM is allocated to the Virtual Machine.
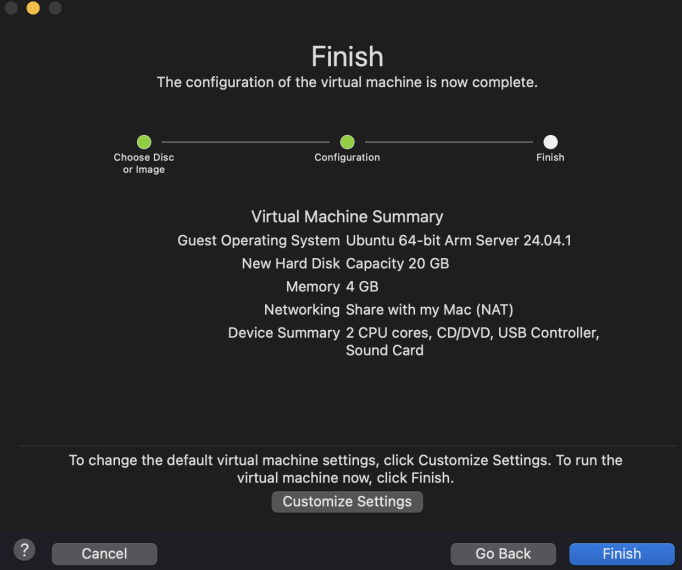
Click continue, and finish.
Warning: Do not run the Virtual Machine yet! If the machine is automatically ran when you clicked finish, click "Virtual Machine" on the toolbar, and click "Shut Down." If the option is grayed out, your machine is suspended. To unsuspend it, click the play button on the window. You should now be able to shut the machine down.
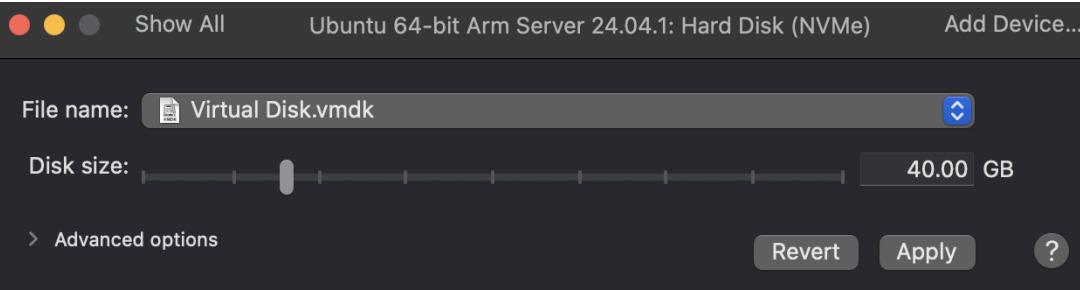
Click on the settings icon on the virtual machine. This will launch the settings window. On the settings window, click "Hard Disk".
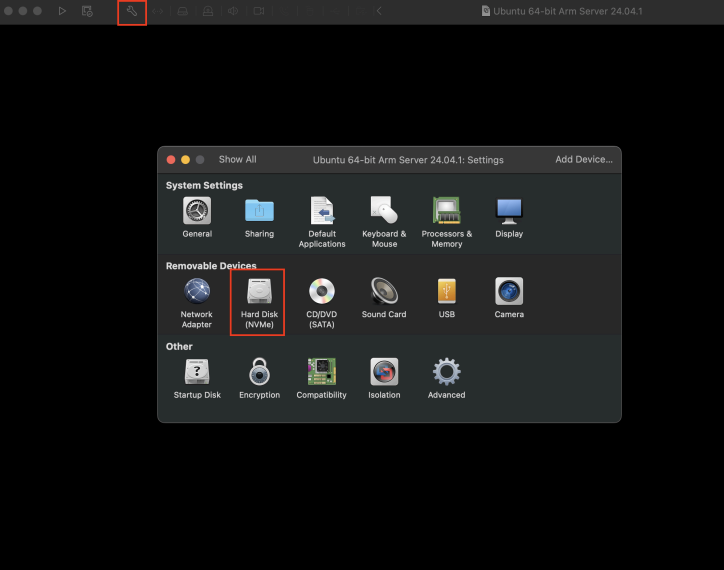
The next prompt asks for how much disk space the virtual machine will use. As you will not require much space for running your projects, this does not need to be large. We suggest providing a maximum disk size of 15 GB or larger.
You can also set up shared folders using settings later; this will enable you to easily share files between your local computer and the virtual machine filesystem.
Now, launch the VM by clicking the play icon on the window.
VMWare Workstation Pro (Windows)
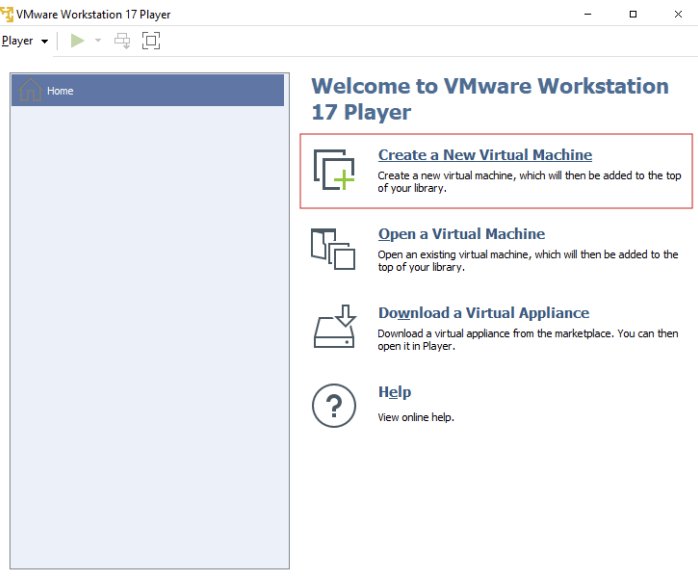
Launch VMWare Workstation. Once it is launched, select "Create a New Virtual Machine".
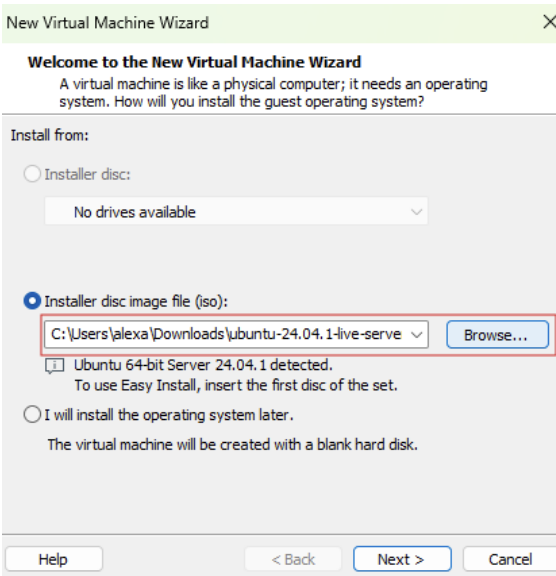
The next prompt asks for what operating system image to use. Select "Browse" to specify the .iso file you downloaded from the Ubuntu website and select "Next".
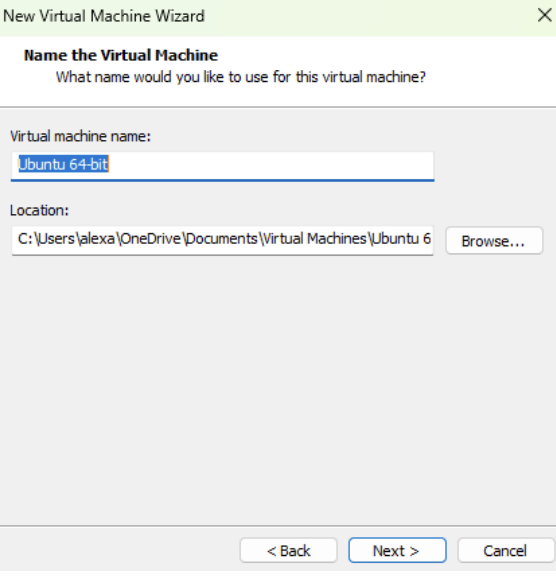
The next prompt asks for the name and location of your virtual machine. You can change this to whatever you would like. Select "Next".
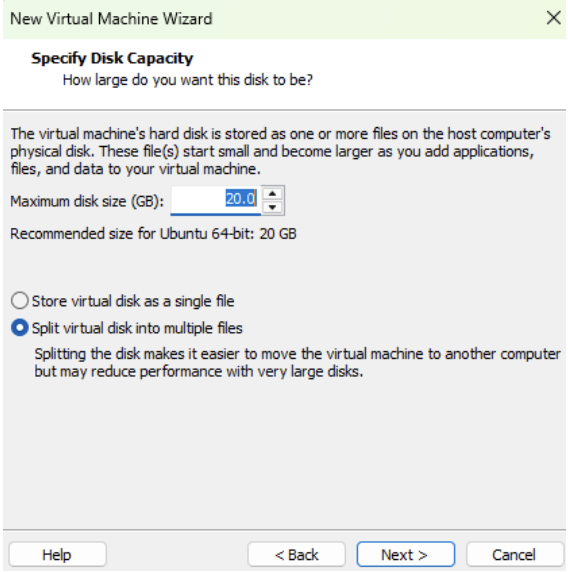
The next prompt asks for how much disk space the virtual machine will use. As you will not require much space for running your projects, this does not need to be large. We suggest providing a maximum disk size of 15 GB or larger.
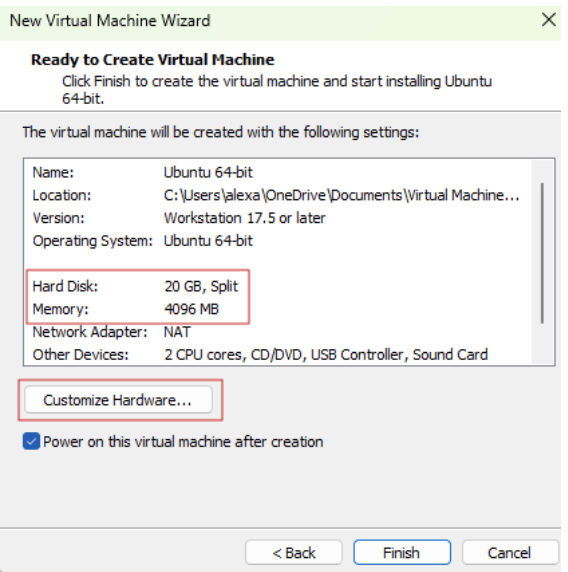
The next prompt asks you to confirm the settings of the virtual machine. Listed will be the hard disk size and memory. We suggest using a memory size of at least 4 GB, so if the default memory size is lower, select "Customize Hardware" uand change the memory. Once you confirm the settings, select "Finish". The virtual machine should then power on.
VirtualBox
Open VirtualBox (Applications folder).
Click New in the toolbar.
Select the disk image that you downloaded earlier.
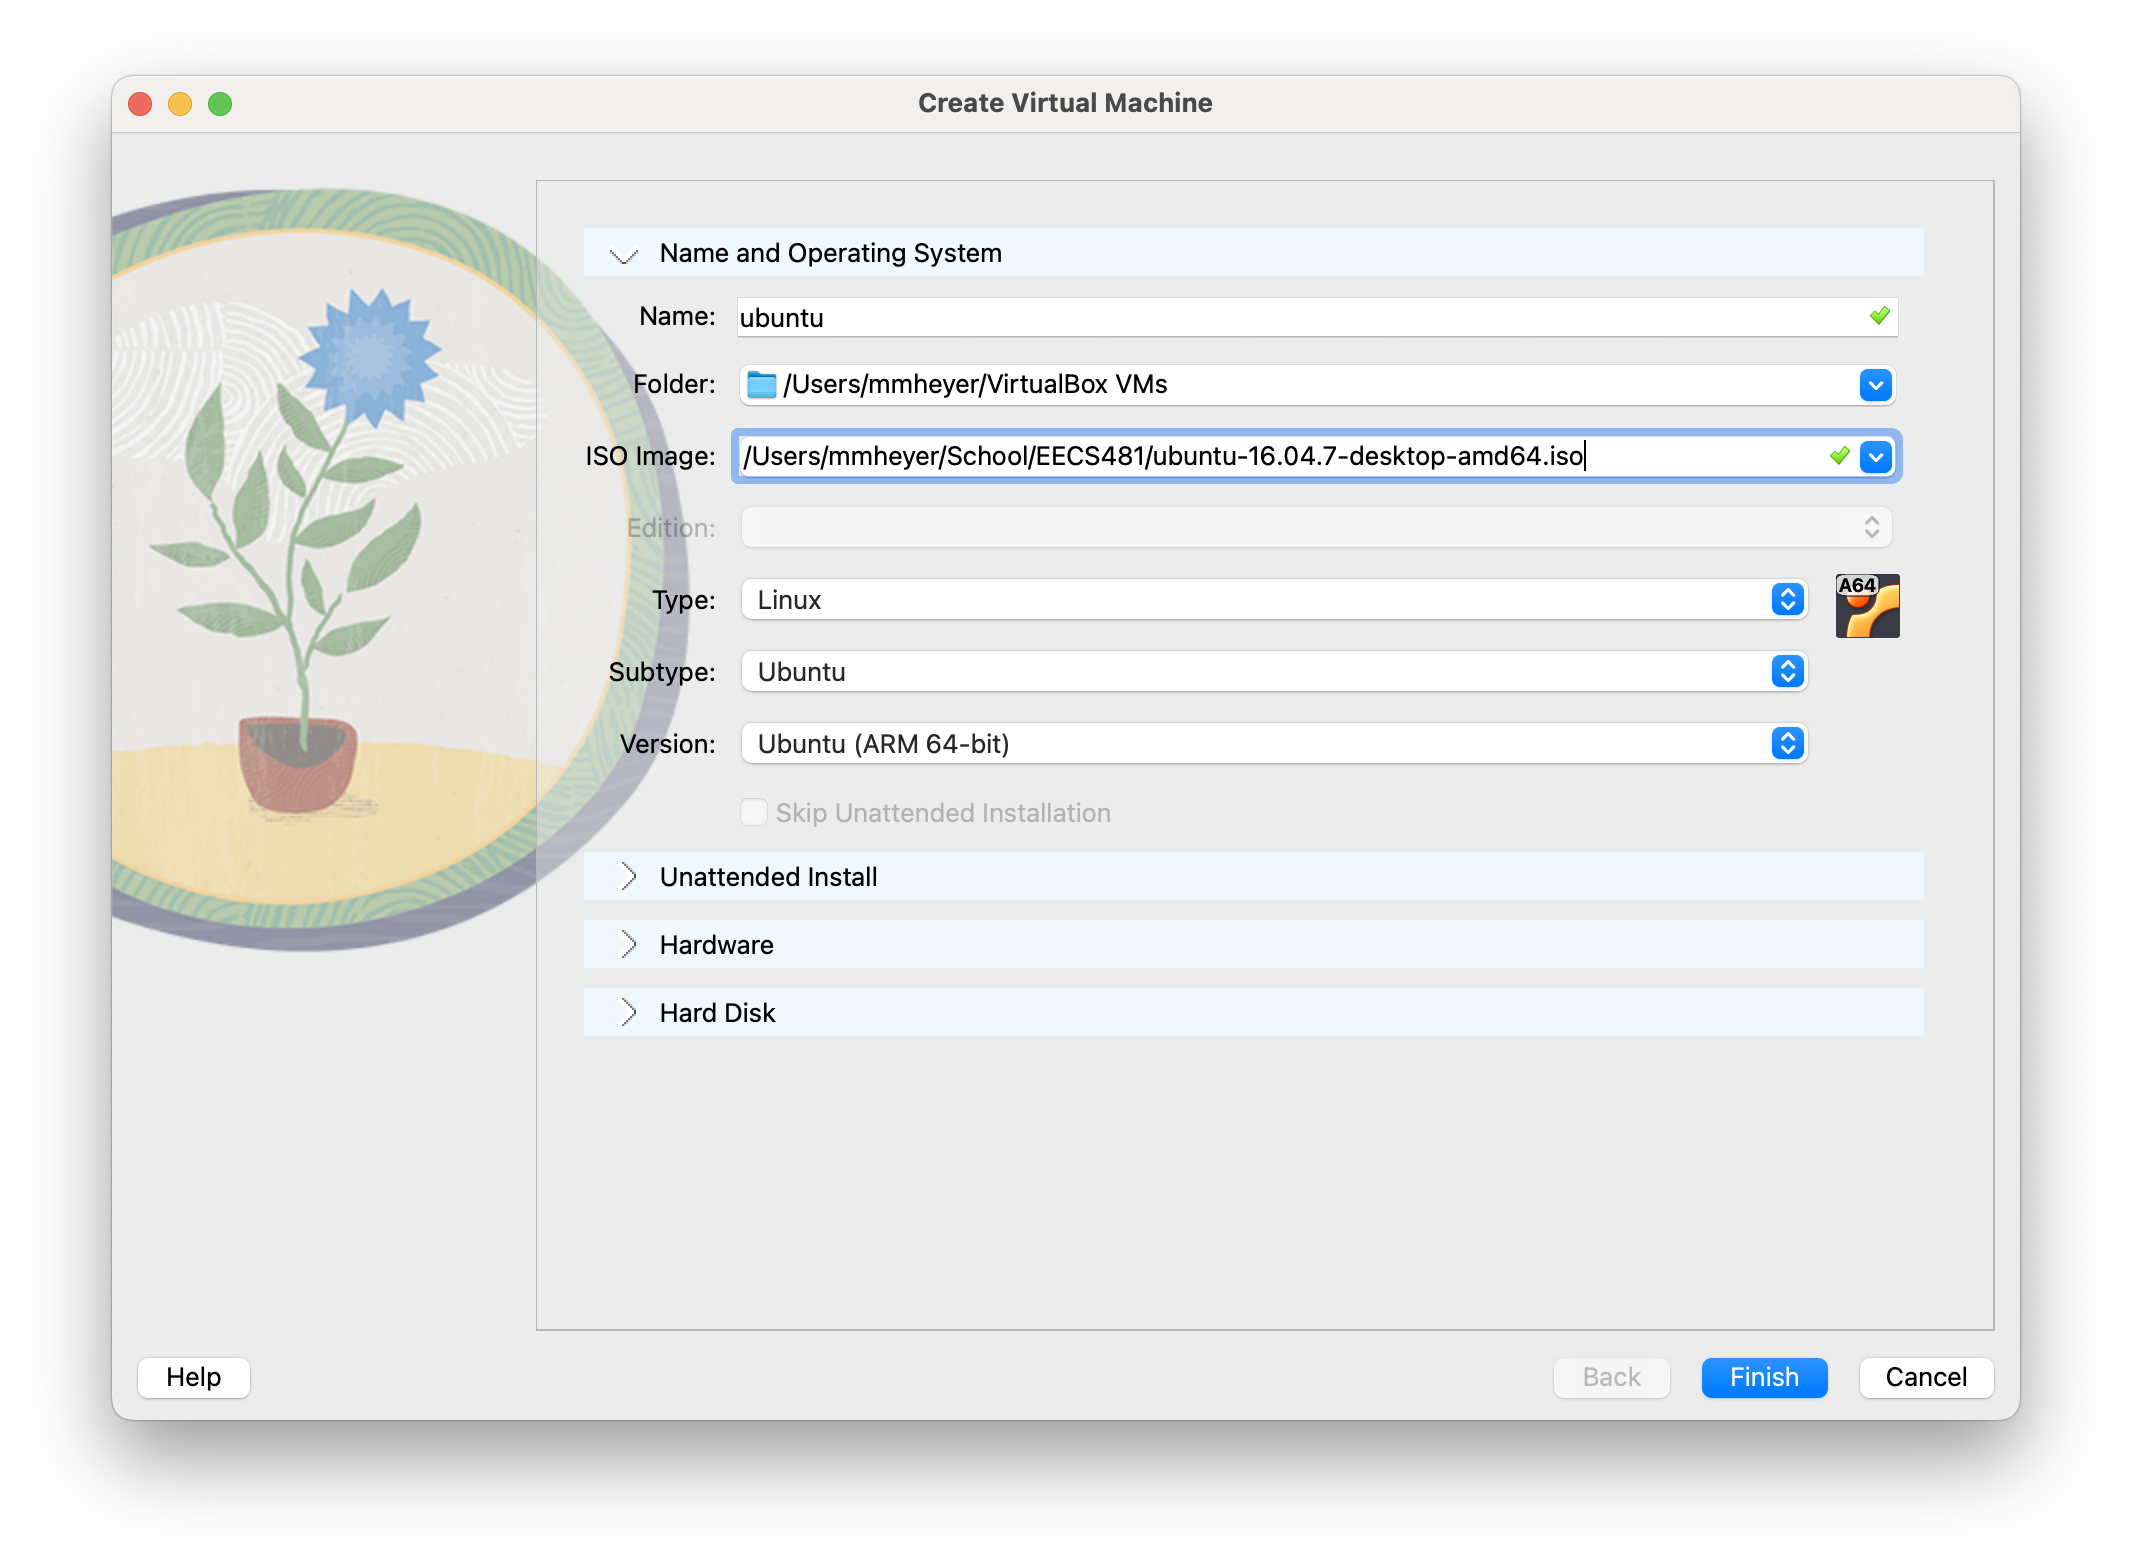
- For the rest of the options, you can choose the default options. However, ensure you allocate at least 4 GB of RAM and 15 GB disk size.
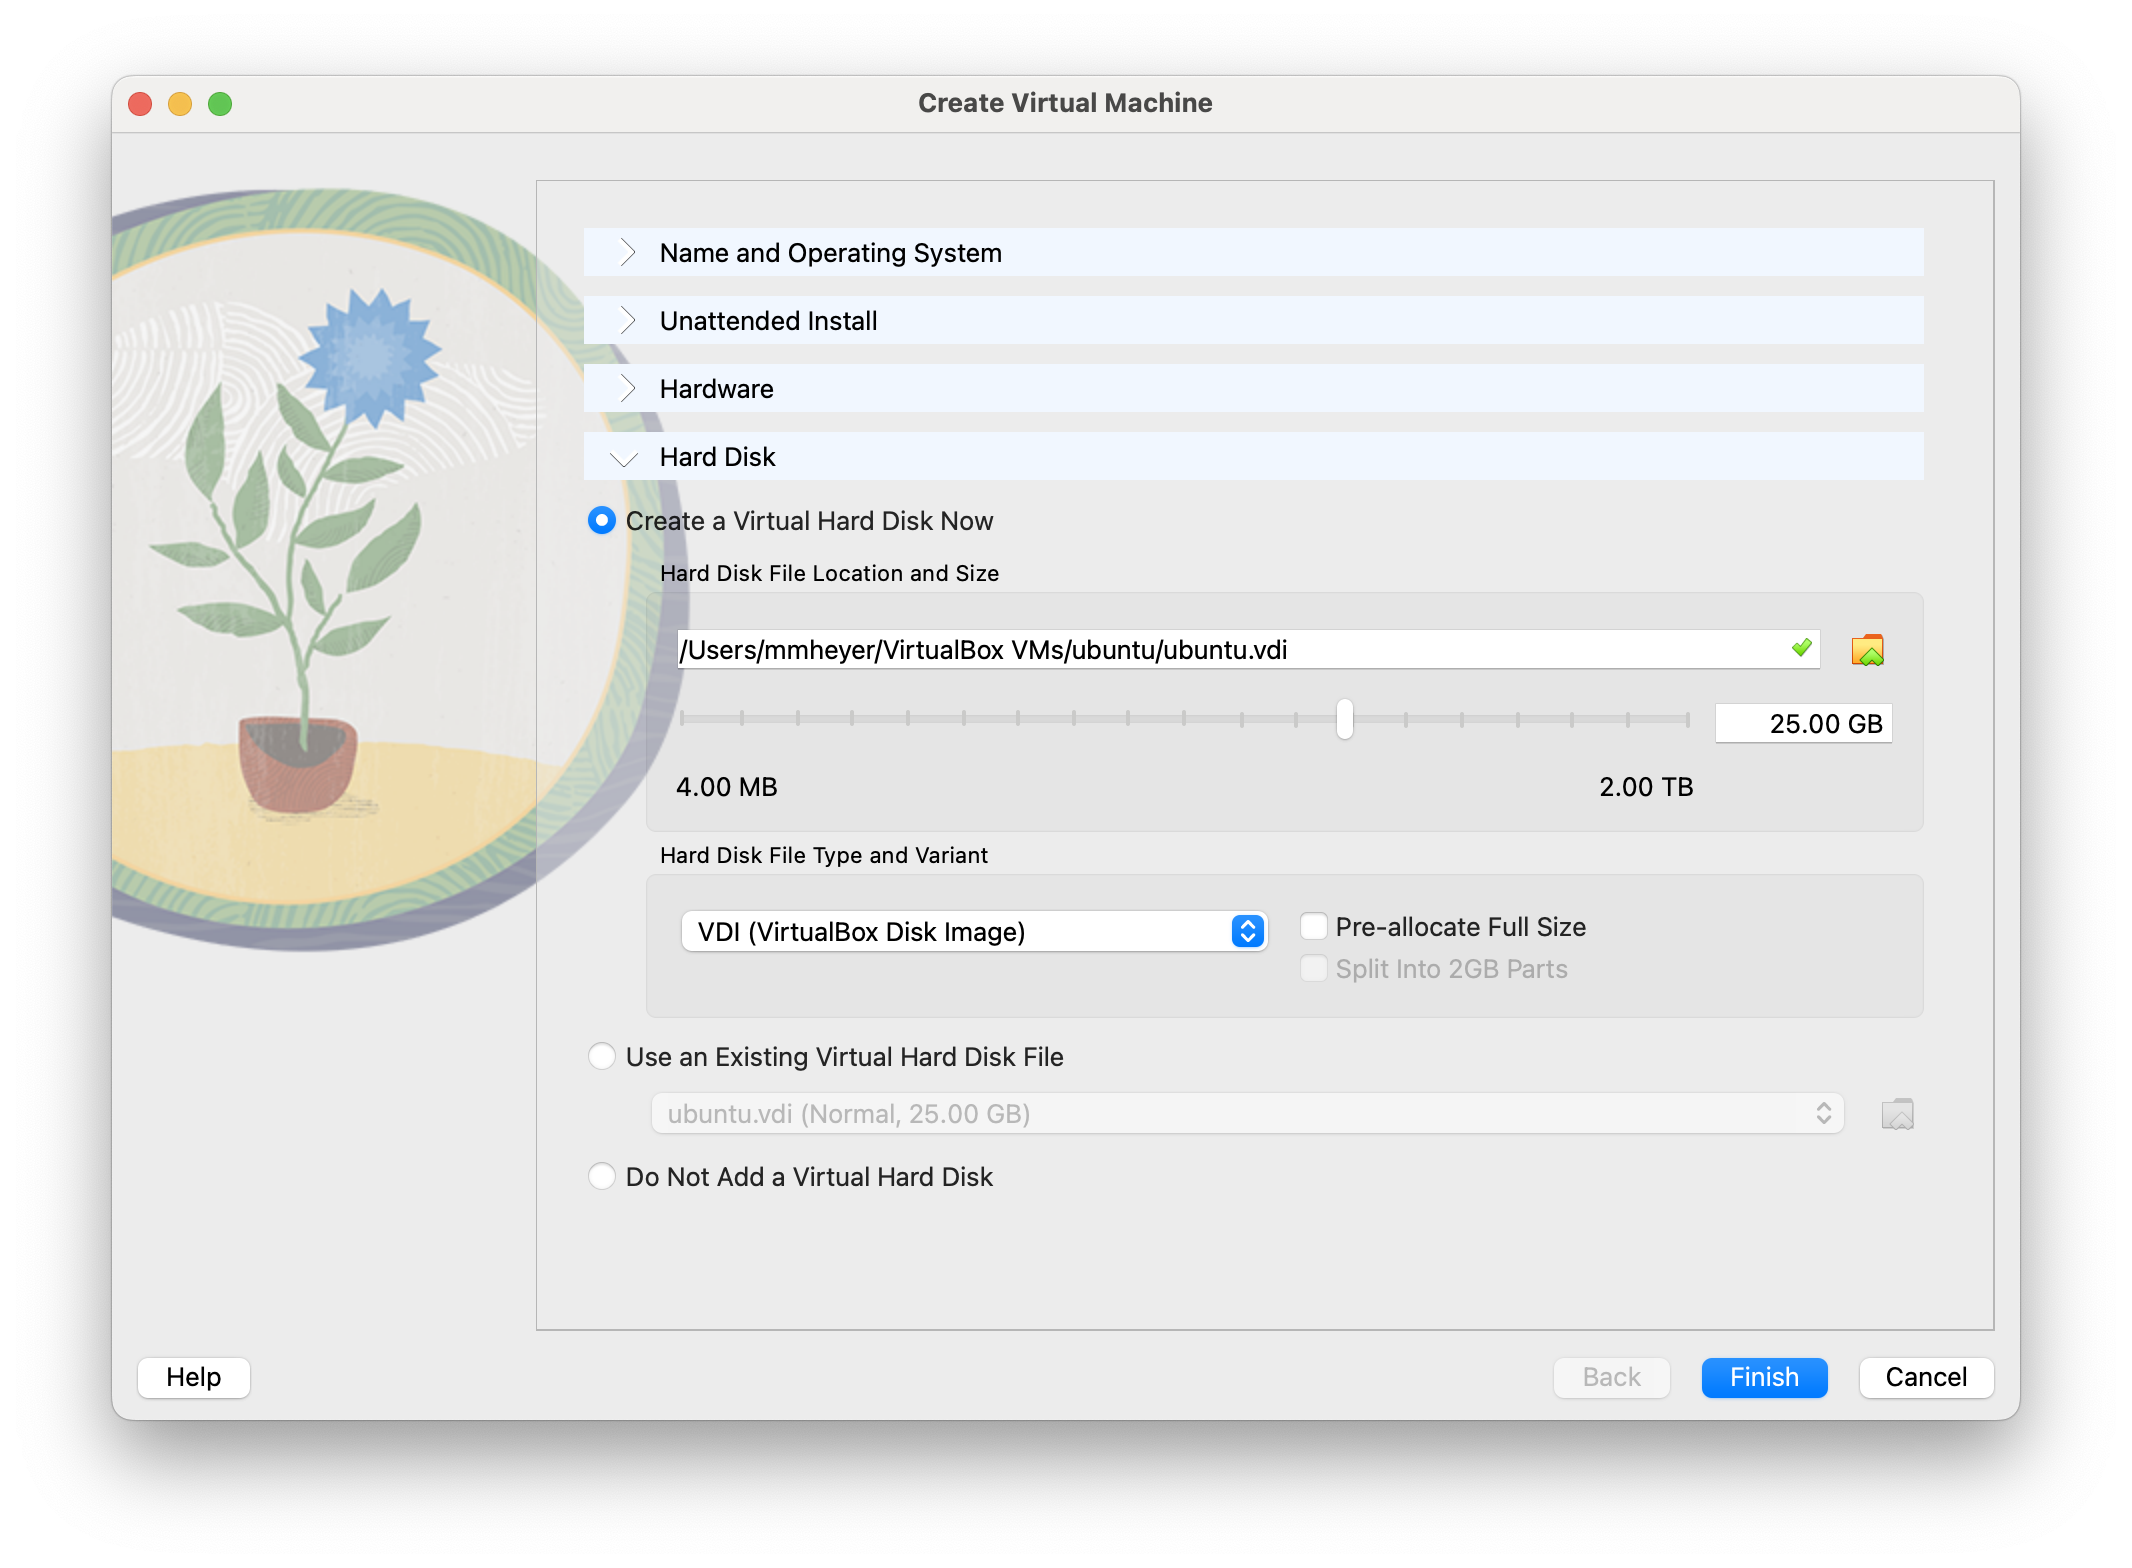
- Select finish to create the VM.
Set Up your VM
Warning: It is important you do everything as directed during the setup. Do not enter a username that is different than what we provide, or change any settings differently. Some of our scripts depend on the username being the same as what we provide.
Note: You cannot use you mouse at this step. Navigate the menus with the arrow keys on your keyboard, and use the "Enter/Return" key to select.
Note: VMWare fusion will "capture" your mouse, which may prevent you from using your cursor outside of the VM. To release your cursor, press the Ctrl and Cmd keys at the same time (CTRL + CMD).
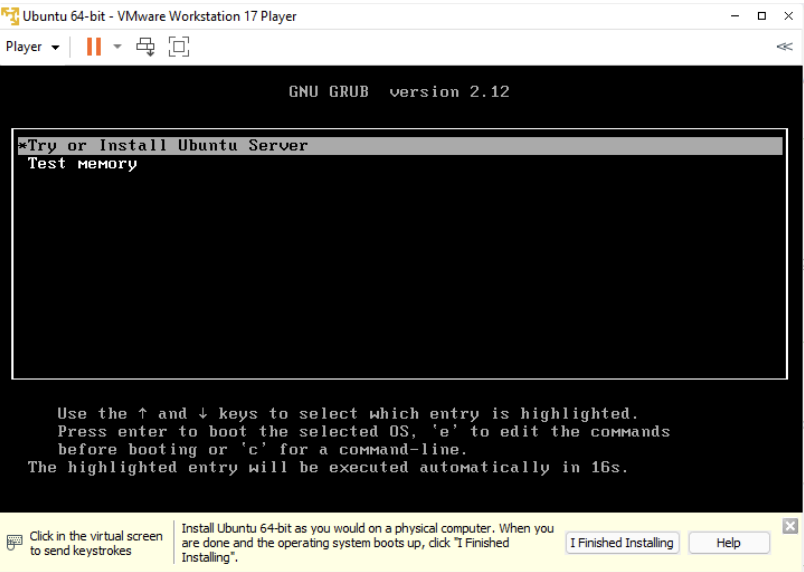
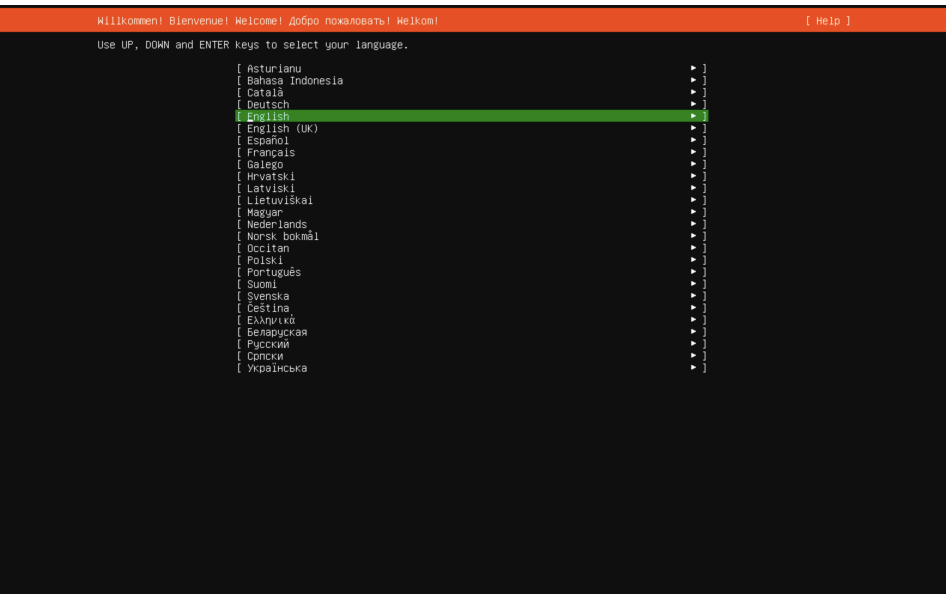
Select "Try or Install Ubuntu Server", and wait for the machine to boot up until you get arrive at this screen. Select English as your language.
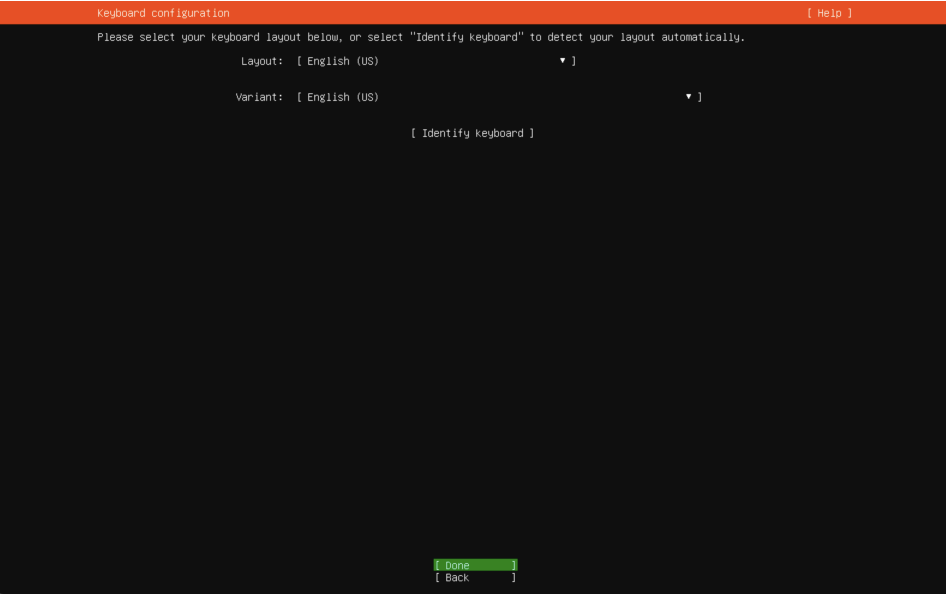
Click "Done" on the next page.
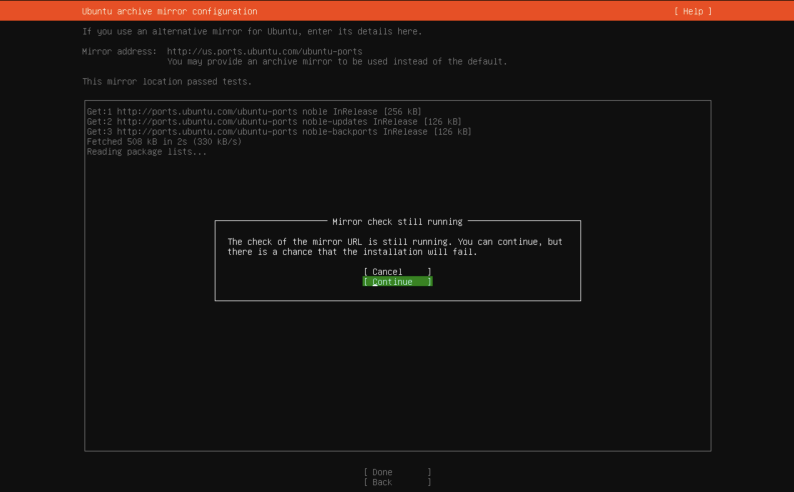
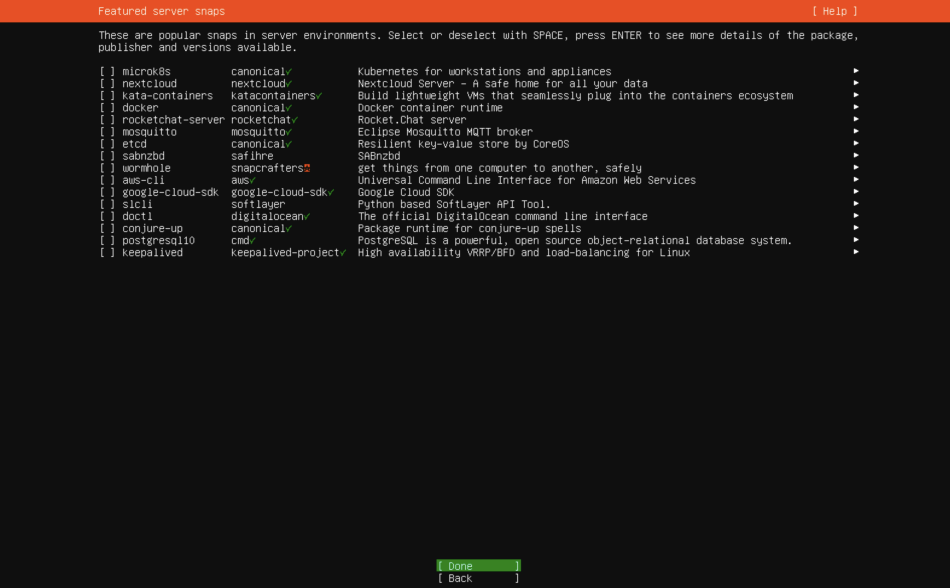
Click through the given options on each of the following screens. You do not need to change anything on the following screens, simply keep hitting "Continue".
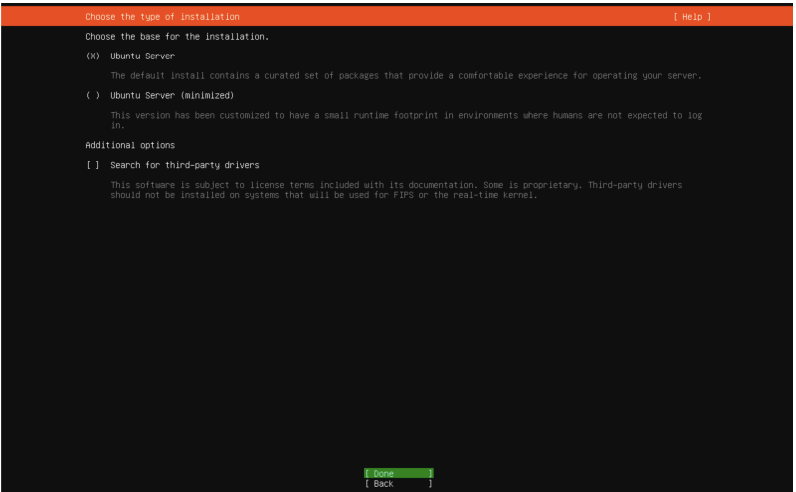


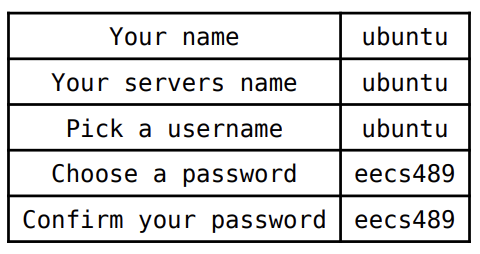
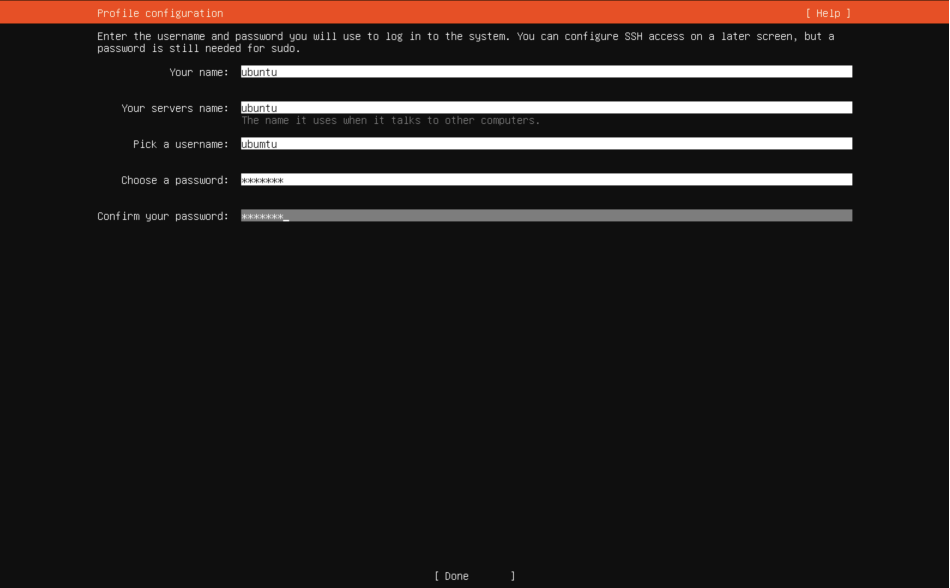
After this screen, enter the following information on the "Profile configuration screen" and hit continue.
On the next screen, click "continue."

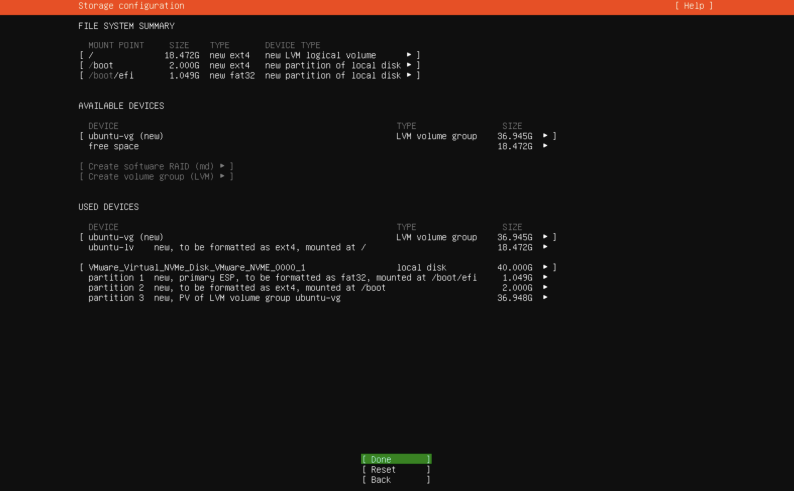
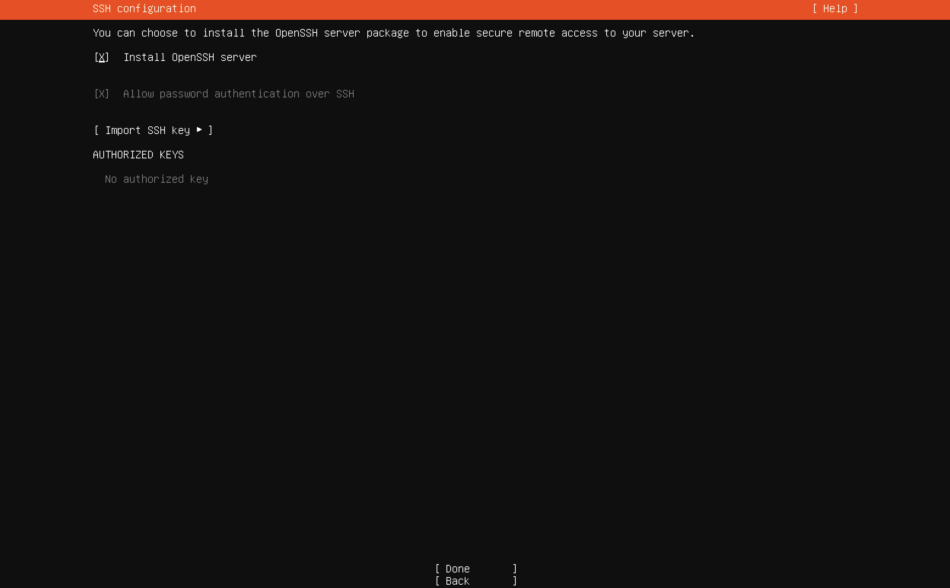
On the next screen, make sure your selections look like the image below, and hit Done.
Warning: Make sure Install OpenSSH server is checked!
On the final page, hit "Done".
Wait until the installation finishes, and hit "Reboot Now."

If you see this, just hit "Enter".

On the next screen, enter ubuntu as your ubuntu login, and eecs489 as your password.

Once you are at the command line, enter the following commands:
-
Update and install:
$ sudo apt update $ sudo apt install -y build-essential cmake libboost-all-dev open-vm-tools openvswitch-testcontroller -
Install Mininet:
$ sudo apt-get install mininet -
Verify Mininet installed properly by running:
$ mn --version -
You should get 2.3.0 (or something similar) as an output. Having a
slightly different version will not be a problem. Once the above
commands are complete, run:
$ sudo reboot now
Setting up Remote Development
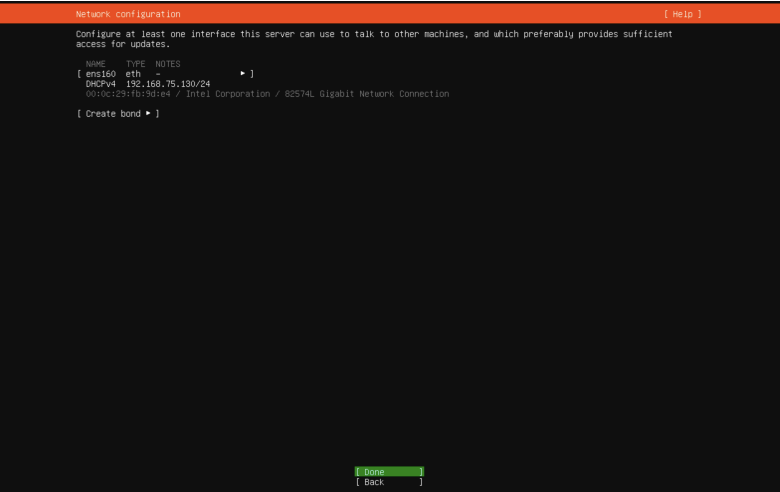
You can now use the terminal to git clone the projects from GitHub and get to work. You will find it helpful to use ssh with tools like VSCode Remote Development or CLion Remote Development to complete your projects. In your virtual machine terminal run
$ ip a
which will produce an output that looks like
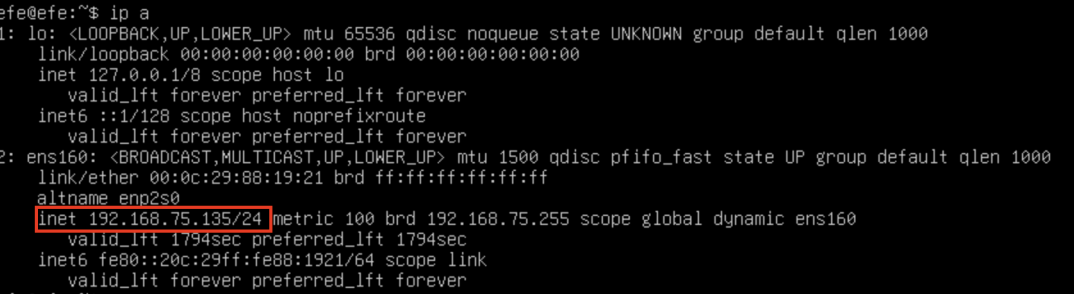
You can use the ip address of ens160 (or whichever adapter other than lo that has a field called inet). In the above photo, the IP is 192.168.75.135. Using that IP address, on your *computer's terminal, you can run
$ ssh ubuntu@<IP>and enter the password eecs489 to login. You can use the same username/password combination for remote development tools. If you want to use VSCode, you can use the Remote SSH extension to then SSH into your virtual machine with VSCode, so you can open folders and modify files within the virtual machine through your local VSCode application. You will use the same ssh command as above to ssh into the VM through the extension.
Special Note: Using WSL on Windows
- WSL (Windows Subsystem for Linux) is useful for running Linux command-line tools but it cannot run full Linux graphical environments or VMs natively. You still need to use VirtualBox or VMWare as described above.
-
Some older versions of WSL (pre-WSL2) conflicted with
VirtualBox/VMWare—if you encounter an error about virtualization not
being available:
-
Ensure WSL2 is installed (
wsl --set-default-version 2). - Make sure Hyper-V is disabled if using VirtualBox (search "Turn Windows features on/off" and uncheck "Hyper-V").
- Restart your computer after disabling Hyper-V or changing WSL versions.
-
Ensure WSL2 is installed (
Troubleshooting & FAQ
- VT-x/AMD-V errors? Enable virtualization in your computer's BIOS/UEFI.
- Mouse/keyboard not working inside VM? Install Guest Additions (VirtualBox) or VMWare Tools.
- No network in VM? Adjust network settings to "Bridged Adapter" or "NAT".